


Refinishing your first project car body is an incredibly exciting experience. It’s a chance to take something old and neglected and transform it into something beautiful! The best part is that once you finish, you can take your creation out for a spin and show it off to the world. But before you get started with your project car body, it’s important to know how to refinish it properly. Knowing how to do these tasks yourself can save you time and money. That’s why we put together this guide on how to refinish your first project car body.
Steps for Refinishing an Auto Body
Refinishing your first project car body may seem like an intimidating task, but if you take it one step at a time, it’s amazing how well you can do. The key to a successful refinishing job is following the right steps. Here’s what you need to do.
Inspect for Damage and Repair Afflicted Areas
Before you begin the refinishing process of your project car body, inspect for any damage. If you simply cover up damaged areas with paint or primer, the results may not last long and can cause further damage down the road. The first step in repairing any afflicted area is to remove rust or corrosion with a wire brush. To patch any holes or dents, use an auto body filler that’s compatible with the surface material of your car.
Sand Down Body Exterior
Once you’ve made any necessary repairs, the next step is to sand the metal surface of your project car to prepare it for priming and painting. Start with medium-grit sandpaper and work up to finer grits as needed. Be sure to use a back-and-forth motion rather than circular to ensure the surface stays even. Pay special attention to any areas that are more prone to rust, such as around screws and seams. Then, finish up by using a tack cloth to remove all dust particles.
Apply Primer and Re-Sand
Primer helps protect the metal surface of your project car from corrosion and makes it easier for paint to adhere. Use an airbrush or spray gun when applying primer for even coverage. Allow the primer to dry completely before moving on to the next step. After the primer dries, lightly sand the surface with fine-grit sandpaper to remove any imperfections and create a smooth finish for painting. Skipping this step can increase your risk of painting over bumps, resulting in a less-than-satisfactory appearance later.
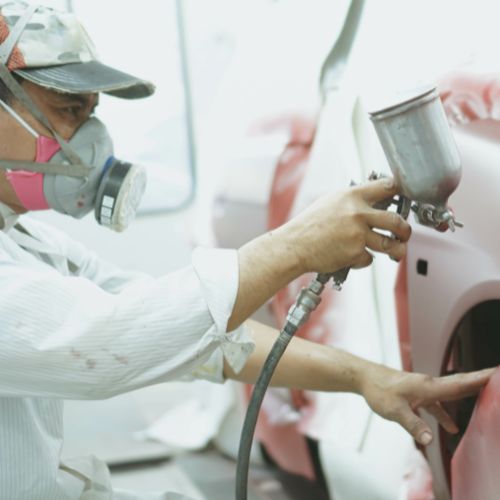
Paint and Customize
Now it’s time to start adding the finishing touches to your project car body. Start by choosing the paint you want—you can opt for a solid color or mix and match colors for a unique look. When painting, use an airbrush or spray gun for even coverage and allow the paint to dry between coats. After you’ve applied all layers of paint, you can customize your car with decals, pinstriping, or any other details that make it truly yours.
Protect and Buff
Even when you think you’re done, there’s still one more thing to do: protect your car with a clear coat. This will help keep your paint job looking shiny and new for years to come. Use an airbrush or spray gun for even coverage and allow the paint to dry between coats. You can then give your car an ultra-shiny finish by buffing it. This will remove any scratches from the refinishing process and give your car a showroom shine.
Tips and Tricks for Achieving a Quality Result
Now that you know the core steps involved in refinishing your first project car body, it’s time to discuss extra tips and tricks. There are several things you still need to have in mind to make the most of this task. Make sure you take these suggestions into account as you enter the planning stages of your car remodel.
Know What You Want
Before you begin your auto body project, it's important to have a clear idea of how you want the result to look. Knowing what you want ahead of time can help you stay focused and on track while you work on the car and prevent any costly mistakes. Take some time to research color schemes and other details that will make your project car body truly unique. Doing this will help you stay organized and save time in the long run.
Purchase Quality Tools and Supplies
When it comes to auto body projects, quality tools and supplies are key. Using the wrong products or materials can make your project more difficult and may even lead to unsatisfactory results. Investing in good-quality sandpaper and a spray gun or airbrush will save you time and money and will ensure you get the best possible finish. Don’t forget to purchase protective gear such as gloves, a face shield, and safety glasses to keep yourself safe while working on the car. While they are rewarding, these projects can also be incredibly dangerous.
Take Your Time
Refinishing an auto body is not a task to rush. It requires patience, precision, and attention to detail. Take your time with each step of the process, from inspecting for damage and making repairs to sanding, priming, and painting the car. This will ensure you don’t speed through any steps or miss any important details. Taking your time with the project will also help you keep a clear head and make sure that you complete everything correctly and achieve a quality result. Even if you experience frustration with certain aspects of the process, you’ll have the chance to cool off and approach things as needed later.
Refinishing your first project car body can be a daunting task, but with the right steps, tips, and supplies, you can achieve stunning results. Eagle National wants to see both DIY car enthusiasts and automotive professionals succeed with their car body work. That’s why we make sure to always have a diverse selection of auto body shop supplies available for purchase. Regardless of your needs and skill level, there are products out there to get you the results you want. Get shopping, start refinishing, and enjoy the fruits of your labor!
