

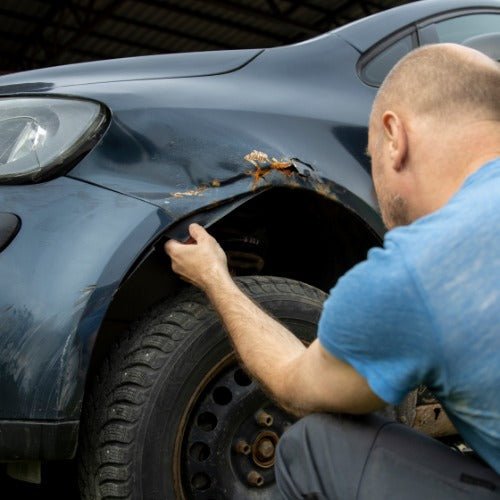
A vehicle’s exterior paint gets most of the attention when rust prevention comes up, but some of the most vulnerable areas are much less visible. Wherever body panels meet, overlap, or form joints, those connections can create small spaces where water and contaminants can collect. Seam sealer helps close those spaces and protect the underlying metal.
When the sealer remains intact, it provides an important barrier against moisture. Once it cracks, separates, shrinks, or otherwise loses its seal, that protection can deteriorate. Understanding how seam sealer failures can cause rust damage can help vehicle owners and body shops identify potential trouble before corrosion spreads into a larger repair.
What Seam Sealer Does
Automotive body construction creates numerous seams and joints. These areas may appear tight, but small gaps can still provide pathways for moisture. Seam sealer is applied to selected joints to close those pathways and help keep water away from vulnerable metal surfaces.
You may find seam sealer around floor pans, wheel housings, trunk areas, body panel joints, and other locations where panels come together. Its exact placement varies by vehicle construction and repair history. In each application, however, the basic purpose is similar: creating a continuous barrier along the joint.
Seam sealer also needs to remain properly bonded to the surface. A bead that looks present but has separated along an edge may no longer provide the protection expected from it.
How Seam Sealer Starts to Fail
Seam sealer does not always fail dramatically. Sometimes the first sign is a fine crack, lifted edge, or small section that has begun separating from the surrounding surface. These minor defects can become entry points for water.
Age, environmental exposure, surface movement, and previous repair conditions can all affect sealed areas. Problems can also occur when a repair surface is not properly prepared or when the selected product is applied incorrectly. Because seam sealer products and procedures vary, technicians and DIY users should follow the manufacturer’s directions for surface preparation, application, curing, and compatible coatings.
The location can make early failure difficult to notice. A damaged seam inside a wheel housing or underneath a vehicle, for example, may receive repeated exposure to water and road contaminants without being regularly inspected.

Why Small Gaps Can Lead to Rust
Rust requires the right conditions to develop, and moisture reaching exposed steel is a major concern. A break in a sealed seam can give water access to areas that are difficult to dry and inspect.
The shape of overlapping panels can make the situation worse. Moisture may enter through a narrow opening and remain between surfaces longer than it would on an exposed exterior panel. If protective coatings are damaged or incomplete in that area, corrosion can begin on the metal.
This is one reason a relatively small seam sealer defect deserves attention. The visible opening may represent only the entry point. Corrosion can develop farther along the seam or underneath surrounding materials where it is not immediately apparent.
Hidden Rust Can Spread Before It Is Obvious
Rust on an exposed body panel is usually easy to see once it reaches the surface. Corrosion around a sealed joint can be more difficult to detect because seam sealer, paint, undercoating, trim, or overlapping metal may obscure the affected area.
As corrosion progresses, changes may eventually become visible around the seam. The surrounding coating might blister, the seam sealer could lift, or rust staining may appear. At that stage, the affected area may extend beyond the first visible sign.
For restorers and repair professionals, this makes careful inspection important. Simply covering a suspicious seam without determining what is happening underneath can leave existing corrosion in place. The condition of the underlying metal needs to be evaluated before the area is resealed.
Surface Preparation Matters During Seam Repairs
A successful seam repair begins with a suitable surface. Applying new material over loose coatings, contamination, moisture, or untreated corrosion can interfere with adhesion and may prevent the repair from providing the intended protection.
The exact preparation process depends on the repair area, substrate, coating system, and seam sealer being used. Product technical information should guide decisions about compatible primers, preparation methods, application thickness, curing times, and topcoats.
This is particularly important when working with refinishing products such as primers and automotive adhesives. Products used near one another need to be compatible with the repair system rather than selected based only on convenience.
Rushing preparation can undermine the entire job. Taking the time to inspect, clean, prepare, and apply materials according to their instructions provides a better foundation for a durable repair.

Why Painting Over the Problem Is Not Enough
When rust staining or coating damage appears around a seam, it can be tempting to sand the visible area, apply paint, and consider the problem solved. That approach may improve appearance without addressing the pathway that allowed moisture into the joint.
If failed seam sealer remains nearby, water can continue reaching the area. Likewise, corrosion hidden beneath the old sealer may remain active if the repair addresses only what is visible on the surface.
A more complete approach involves identifying the extent of the affected area and the source of moisture intrusion. Damaged or poorly bonded material may need to be removed as appropriate so the underlying condition can be assessed. From there, the metal and surrounding surfaces can be prepared according to the products and repair process being used.
Protecting Seams Helps Protect the Body
Rust prevention involves more than maintaining a vehicle’s visible painted surfaces. Panel joints, overlaps, and hidden seams are also part of the body’s protective system, and damaged sealing materials can leave those areas vulnerable to moisture.
Knowing why failed automotive seam sealing can lead to corrosion damage makes it easier to understand why small cracks or lifted edges should not automatically be dismissed as cosmetic flaws. A damaged seam can provide moisture with access to metal that is difficult to inspect and dry.
Whether you are restoring a project vehicle, completing body repairs, or maintaining a finished vehicle, careful preparation and proper product use matter. Inspecting suspicious seams, addressing existing corrosion, and following the seam sealer manufacturer’s application requirements can help create a more durable repair and reduce the opportunity for rust to return.