

Are you looking for a way to give your car that glossy showroom finish? Wet sanding is the perfect project if you want to upgrade the look of your vehicle. The process is easy enough for even beginner DIYers and will produce professional results. In this ultimate guide, we’ll go over everything from safety tips to materials to special techniques and more so you can start wet sanding your car today!
What Is Wet Sanding, and How Does It Work?
Wet sanding is simply using sandpaper and water to smooth out imperfections on your car. Wet sanding can remove paint defects from scratches, small dents, oxidation, and other minor damages.
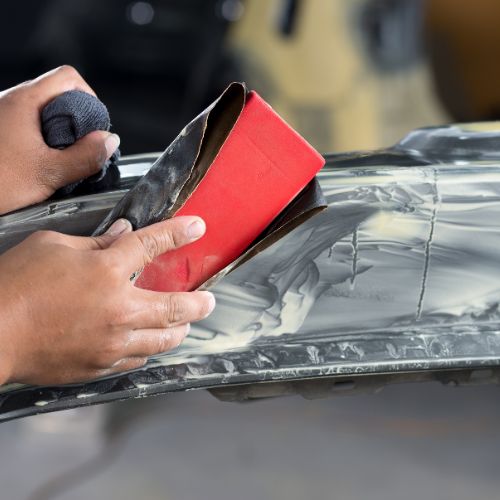
The process involves gently moving an abrasive paper across your car’s surface while using a light stream of water to lubricate the sandpaper and keep it from clogging. Wet sanding will help you achieve a smooth, glossy finish on your car without damaging the paint or causing long-term damage.
Preparing for Wet Sanding
Before you start wet sanding, there are a few things you’ll need to do to ensure the process goes smoothly. First and foremost, clean your car thoroughly with soap and water. This cleaning will help remove any dirt or debris that could interfere with wet sanding. Additionally, you must identify the areas you’ll be wet sanding. This will help you stay organized and ensure you treat all areas evenly.
Next, you’ll need to gather the right materials. Here are the key materials you’ll need:
- Safety glasses or goggles
- Mask
- Bucket of water
- Sponge
- Sandpaper (ranging from 400 to 2000 grit)
- Compound and polish
- Microfiber towels
Step-by-Step Instructions on How To Wet Sand a Car
Now that you have prepped and collected all the necessary materials, it’s time to wet sand your car. Here are the steps in order:
- Start by donning safety glasses or goggles and a mask.
- Fill a bucket with water.
- Begin sanding with 400-grit paper, applying light pressure across the car’s surface in one direction while lightly spraying the sandpaper with water.
- Once you’ve finished, rinse your car with a clean sponge to remove residue.
- Next, move up to the 600-grit paper and repeat steps 3–4 until you’ve covered all areas of the vehicle with the sandpaper.
- Move to 800-grit paper and repeat steps 3–4 until the vehicle is smooth.
- Use 1000-, 1500-, and 2000-grit paper to refine the surface of your car even further, repeating steps 3–4 as necessary.
- Once you have wet sanded your entire vehicle with the desired grit, use a compound or polish on the entire surface to finish your car’s look.
- Finally, lightly buff the car’s surface with a microfiber towel for that extra glossy sheen. Start by wiping down the car one section at a time with the towel. You’ll want to use gentle circular motions and avoid pressing too hard on the surface so you don’t leave any marks.
Tips To Make Your Paint Job Shine After Wet Sanding
Once you’ve finished wet sanding your car, there are a few tips you should keep in mind to get the best possible finish.
- Use even pressure when sanding, and don’t linger on any one spot too long, as this can cause unnecessary damage.
- Remember to rinse the car with clean water after each step of the wet sanding process.
- Use a good-quality wax after polishing to help protect your car’s paint job and keep it glossy for longer.
- Regularly top up the water in your bucket as you go along. This step will help keep the sandpaper clean and lubricated throughout the process.
- Regularly switch out the sandpaper so it doesn’t become clogged or worn out.
- Finally, never use dry sandpaper, as it can damage your car’s paint job.
Common Mistakes To Avoid When Wet Sanding a Car
Wet sanding is an effective method of enhancing your car’s appearance, but you must avoid certain common mistakes to ensure a flawless finish.
One mistake beginners often make is failing to keep the sandpaper wet throughout the process. Dry sandpaper can easily damage the car’s paint, leading to expensive corrections. Another common error is applying too much pressure while sanding, resulting in uneven surfaces or deep scratches. Always remember to apply light, even pressure, across the whole surface. Also, don’t skip any grit levels while sanding. Each grit level serves a specific purpose, and skipping one might result in a less-than-perfect finish. Finally, remember to fully rinse and dry your car between every grit level to ensure no grit residue interferes with the next sanding stage.
Safety Tips for Wet Sanding
Before you start wet sanding your car, make sure to take safety precautions. Always wear protective clothing such as goggles and gloves, and use a dust mask to protect yourself from inhaling particles. Ensure you work in a well-ventilated area. And remember that wet sanding can create slippery surfaces, so be sure to wear nonslip shoes. Lastly, never wet sand in direct sunlight, as this can cause overheating and potential damage to your car’s paint job.
Wet sanding your car may seem daunting initially, but you can use this ultimate guide to help. Wet sanding can be a rewarding DIY project with the right tools, preparation, and a step-by-step approach. Not only does it enhance your car’s aesthetic appeal, but it also provides an opportunity to address minor imperfections that could potentially impact your vehicle’s overall value.
Remember, the key to a successful wet sanding process is patience, attention to detail, and consistency. Don’t rush the process. Take your time to ensure you complete each step properly and thoroughly. With these considerations in mind, you’re well on your way to giving your car a professional, glossy finish that you can be proud of.
If you need a sandpaper roll or other materials to wet sand your car, Eagle National Supply has everything you need to get the job done right. Our auto-detailing products come at unbeatable prices, so check out our website today to find the perfect supplies for your car.
