Are you thinking of giving your car a makeover with a paint job? If so, learning how to mask the vehicle effectively is essential for achieving satisfactory results. Masking involves covering up parts of the vehicle that you shouldn’t paint. Masking helps create crisp lines and ensures an even coat with minimal waste. Let’s look at how to master masking your car for a paint job and get you started on your car transformation journey.
Selecting the Right Masking Tape for Your Project
Selecting the right masking tape is a crucial first step in your painting project. Not all tapes are created equal; the wrong choice could lead to paint bleeding onto the areas you want to protect or damaging the vehicle’s surface upon removal.
For automotive projects, use specialty automotive masking tapes. These tapes withstand higher temperatures often associated with automotive painting. They provide a strong seal against paint bleeding and are easily removable without leaving residue. However, you should always test your chosen tape on an inconspicuous area first to ensure it doesn’t damage the car’s finish.
Look for flexible tape, as it must adhere to curved surfaces and angled edges. It should also be resistant to solvents in car paints. Lastly, consider the tape’s width. Narrower tapes are excellent for masking small intricate areas, while wider tapes work best for larger surfaces.
Preparing the Car Surface for Painting
Before applying any tape, you must thoroughly clean the car’s surface so it’s free from dirt, dust, and grime. Any contaminants can affect paint adhesion and result in an uneven finish.
Start by washing the vehicle with soap and water, then dry thoroughly. Next, use a wax and grease remover to eliminate residue. Finally, wipe down the entire surface with a lint-free cloth and isopropyl alcohol to remove any remaining contaminants. Ensure the car surface is completely dry before starting the masking process.
Applying the Masking Tape in a Professional Manner
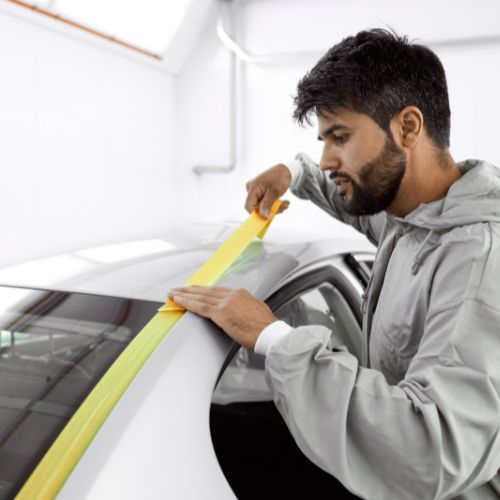
Mastering the application of masking tape is essential for achieving professional results. It requires patience, precision, and attention to detail. These are some tips to help you apply masking tape like a pro:
- Use your fingers or a plastic squeegee to firmly press down on the edges of the tape after applying it.
- Overlap small pieces of tape for maximum coverage when masking off curved or angled areas.
- To create perfect lines, use a sharp blade to cut the edges of the tape.
- When masking off large areas, use a plastic or paper sheet to cover the surrounding surface.
Applying Masking Paper To Protect Windows, Trim, and Rubber Parts
In addition to masking tape, masking paper can cover large areas and provide protection for delicate parts like windows, trim, and rubber seals. When applying masking paper, follow these steps:
- Measure and cut the masking paper to the desired length.
- Fold the bottom edge of the paper up about an inch, then crease it.
- Apply a strip of masking tape along the creased edge, exposing half of the tape.
- Carefully position the paper on the car’s surface where you want it to cover.
- Press the exposed part of the tape onto the car’s surface, then fold the paper and smooth it out, sticking it to the remaining half of the tape.
- Use additional masking tape to secure the edges of the paper and create a tight seal.
Masking Difficult Areas
Masking off complex areas, such as engine bays and other contoured surfaces, can be challenging, but you can do it effectively with patience and precision. Fortunately, the process is very similar to that of masking regular areas; you simply must be extra careful.
Mainly, you want to use flexible masking tape, as it can adapt well to complex shapes. Likewise, consider using heat-resistant masking tape for engine bays since these areas can get quite hot. Be mindful of small parts and crevices, ensuring you properly cover them to prevent paint from seeping in. Masking difficult areas takes more time and precision than masking other vehicle parts does, but your diligence will pay off.
Removing the Masking Material After Painting
Once the paint on your car is completely dry, it’s time to remove the masking material. Start by gently peeling the tape at a 45-degree angle to avoid disturbing the fresh paint job. If the tape is stubborn, heat it slightly with a hairdryer to soften the adhesive. If you’ve used masking paper, remove the tape holding it before pulling it off. Be patient and take your time to ensure you do not damage your newly painted surface. Finally, dispose of the masking material responsibly.
Tips From Professionals
These professional tips will help you get the best results when masking your car.
Practice Makes Perfect
Masking a vehicle may seem challenging initially, but you will improve your efficiency and precision with practice. Start by practicing on smaller, less visible areas before you move on to larger, more obvious parts of your car.
Use Quality Materials
Always opt for high-quality masking tape and paper. Though cheaper alternatives may be tempting, they can result in paint bleeding or residue left on your vehicle. Investing in quality materials will ensure a cleaner, crisper finish with less hassle during removal.
Ensure Proper Lighting
Good visibility is essential for a flawless masking job. Ensure you’re working in a well-lit area or employing additional lighting. This light will help you spot any gaps or areas you may have missed during application.
Timing Is Key
Don’t rush the masking process. Taking the time to carefully apply and remove your masking materials can significantly improve the result. Similarly, ensure the paint is completely dry before removing the masking material to prevent smudging or chipping.
Mastering the art of masking your car for a paint job might seem daunting, but it becomes an attainable skill with patience, practice, and the right materials. Pay attention to details, ensure the surface is clean, and take your time during both the application and removal of the masking materials. Following this advice will contribute to the success of your paint job.
If you need automotive restoration products, Eagle National Supply has everything you need to get started on your project. We provide high-quality products at competitive prices, from masking tapes and papers to primers and clear coats. Visit our website for more information, or contact us today for any questions or assistance with your project.


