

Wet sanding a car can breathe new life into its finish, restore its original luster, or prepare it for a fresh coat of paint. This technique is also great for removing surface imperfections, such as scratches, dents, or rust spots, that might ruin the car’s appearance.
If it’s your first time attempting wet sanding, you might make a few mistakes. Whether you skip a step or follow the improper technique, even small errors can cost you time and money.
We’ve outlined the most common mistakes people make when sanding a car and how to avoid them for smooth, professional-grade results.
1. Skipping Preparation Steps
Wet sanding doesn’t start with putting sandpaper to the car’s surface. The prep work is just as important as the sanding itself.
Cleaning the Surface

Dust, debris, and contaminants make it harder to sand evenly and can cause deep scratches. Thoroughly wash and dry your vehicle before beginning. Dirt and grime will stick to the sandpaper, damaging the finish rather than smoothing it, so don’t miss a spot when cleaning the vehicle!
Protecting Non-Sanding Areas
Use masking tape to cover areas you don’t want to sand before you begin. This simple precaution can save you from accidentally damaging parts of your vehicle that don’t require sanding.
2. Using the Wrong Tools
Wet sanding involves several specific materials, and substituting or skipping them can lead to poor results or damage your car’s surface. Here’s what you’ll need:
Safety Accessories
Safety should always come first. When sanding a car, wear personal protective equipment (PPE) such as gloves, goggles, and a mask. Sanding can create fine dust, and protecting yourself prevents harmful particles from entering your lungs or eyes.
Quality Sandpaper
Using old or low-quality sandpaper can damage the surface of your car and leave uneven scratches. Wet sanding requires waterproof sandpaper with the appropriate grit level. You’ll start with 1000 or 1200 grit and move to a finer grit, like 2000 or 3000, as you progress.
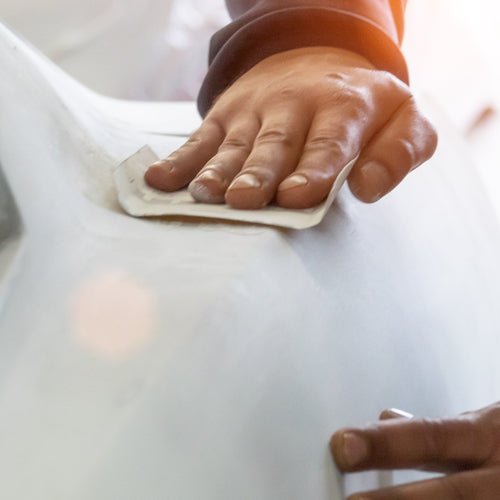
Sanding Block
Attempting to sand with just your hands can result in uneven pressure, inconsistent results, and potential damage to the clear coat. By using a sanding block, you achieve a uniform finish.
Water Sprayer
Wet sanding requires continual lubrication, and a water sprayer is the simplest and most effective tool for the job. Using a consistent spray of water minimizes friction and makes the sandpaper glide smoothly.
Microfiber Towels
Microfiber towels are perfect for wiping down the surface during and after sanding. They’re gentle on a vehicle and remove debris without scratching.
3. Using Ineffective Techniques
Poor or inefficient techniques can undo all the effort you’ve put into preparation. Follow these tips to get it right:
Replace Sandpaper With Different Grit Levels
Progression is key when it comes to sanding a vehicle. Start with coarse-grit sandpaper, like 1000 or 1200, to remove large imperfections or rough areas. Then, gradually move to fine-grit paper, such as 2000 or 3000, for a smooth, polished finish. Skipping levels or failing to switch paper as you progress can leave the surface uneven or result in swirl marks.
Rinse Between Stages
Always rinse the surface thoroughly between grit levels. Otherwise, you might trap small particles between the surface and the new sandpaper, causing micro-scratches. A quick rinse cleans the area and readies it for the next stage of sanding.
4. Damaging the Car During the Process
Once you’ve begun sanding, your technique directly impacts the results. Unfortunately, many first-timers make mistakes that can cause irreversible damage to the car’s surface.
Applying Light Pressure
If you apply too much pressure, the sandpaper can cut through the clear coat much faster than intended, exposing the base paint or the primer. Once the car loses its protective layer, the paint underneath becomes vulnerable to fading, chipping, and environmental damage. Fixing this costly mistake often requires professional refinishing to restore the original look of the vehicle.
To avoid this issue, focus on using a light, consistent touch throughout the sanding process. The goal is to let the sandpaper do the work rather than forcing it with heavy pressure. Use slow, steady movements and evenly go over the surface to avoid creating uneven patches or burn marks in the finish. Also, frequently check your progress so that you’re not over-sanding.
Using Wet Sanding Techniques
Use water when sanding to reduce friction and prevent damage to the vehicle’s surface. Dry sandpaper can create scratches instead of smoothing the area, resulting in an uneven finish.
Always have water nearby while sanding. Regularly spray the sandpaper and the area you’re working on so they stay wet throughout the process. This will help you achieve a smooth, polished result.
5. Forgetting Follow-Up Tasks
Even after sanding, your job isn’t done. Follow-up is necessary to achieve a professional-quality finish.
Cleaning the Vehicle
Once you’ve finished sanding, thoroughly clean the vehicle to remove residue. Start by using a vacuum or brush to clear away debris. Then, wipe down the surface with damp microfiber towels or a gentle cleaning solution.
Polishing the Paint Job

Start by selecting a high-quality polish that suits your car’s paint type. Apply the polish evenly using a clean applicator pad or a polishing machine, working in small sections for precision. Buff the area gently in circular motions, then wipe away excess with a microfiber towel. Repeat as needed for a flawless, glossy finish.
Buffing Your Work
Start by applying a small amount of buffing compound to the surface or directly onto the buffing pad. Work in small sections and circular motions, using light to moderate pressure for even coverage. Gradually increase the speed, and avoid staying in one spot for too long to prevent damaging the surface.
Once the area looks smooth and glossy, use a clean microfiber towel to wipe away residue. Repeat this process as needed to achieve a flawless, even finish and seal the surface for long-lasting protection.
Sanding Your Car the Right Way
Now that you know the most common mistakes to avoid when sanding a car, you’re ready to begin with confidence! Make sure you have all the right tools, including high-quality car sandpaper. You can find everything you need at Eagle National Supply, your trusted source for professional-grade supplies.